Blackline Strike: Desert Warfare places you in a searing desert conflict zone where skillful shooting and terrain utilization determine who survives.
Match Pacing and Gameplay Analysis
Understand how a regular round in Blackline Strike: Desert Warfare plays out to avoid surprises on the battlefield. Instead of lengthy item collection, the game emphasizes situational competence in three phases:
- Step 1: Deploy and Position: After spawning, rapidly examine the terrain and choose a primary path, such as via a warehouse or along the outside corridors. Since opponents might quickly approach your starting point, never stand still.
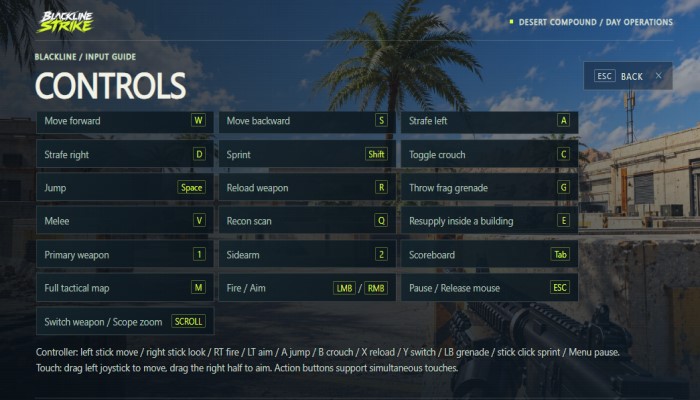
- Phase 2: Engagement and Angle Control: Round corners with your crosshair at chest height. Mix precision aiming down sights (RMB) with lateral movement (A/D) to dodge incoming fire when you find a target.
- Phase 3: Repositioning and Reloading. Your gunfire will show where you are on the map after each kill. Retreat behind cover right away to reload (R), then move to a new hiding place instead of staying where you are.
Master Desert Battlefield Combat Tips
Kill more attackers and avoid blind spots.
Practical methods to improve your game:
- Avoid racing straight across the middle courtyard, which has a wide view but little cover. To approach opponents safely, use side hallways or building interiors until necessary.
- Before leaving a warehouse, check the upper floors or raised platforms across the way. These are great ambush places for foes.
- Burst fire is best for medium-to-long-range combat in open locations because holding down the trigger creates recoil, which distorts your aim. Instead, fire in 2-3-round bursts to stabilize your crosshair and maximize damage.
- Before clicking the 'R' key, reload after every skirmish. After killing a target and clearing the area, hide behind a wall to reload for the next battle.
Prepare your weapon, use the desert complex's topography, and show off your sharpshooting!